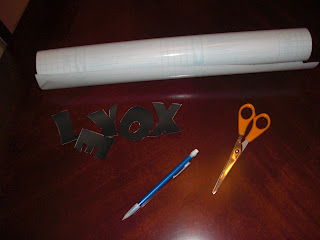
Contact Paper
Stencils
Materials needed:
*Contact paper (I buy this in a roll
for less than $3.00)
*Scissors
*Pencil
*Print-out of letter or object that you are going to make a stencil of
*Scissors
*Pencil
*Print-out of letter or object that you are going to make a stencil of
(Sorry that I didn’t get a picture of
the letters before I cut them out. I hadn’t actually planned on making this
blog, but when I started typing up the blog post for the candle jars, I thought
this might be helpful.)
**Please note that these stencils
will most likely only be able to be used once since they will get pretty messy
when using them with paint.**
Instructions:
1. Print out whatever letters or
objects you want to make a stencil of. In order to do this, I just found a font
that I liked in Microsoft Word and typed up what I wanted to have made into a
stencil.
2. Cut out the letters or objects
that you printed out. Get as close to the edge as you can when you are cutting
and try to cut as straight as you can so that your stencils do not wind up all
crazy looking.
3. Trace the letters or objects that
you want to use on the backing side of the contact paper. You will need to turn these the opposite
way in order to have the letters and objects be the way that you printed them
out.
4. Cut the letters or objects out of
the contact paper. Leave the backing of the contact paper on until you are
ready to place this on whatever project you are working on.
This is a great cheap way to make
stencils especially if you are using them for painting because you do not have
to worry about washing them when you are done. I just use these for one project
and then throw them away when I am done.
Ok, I know I should have a picture of
the stencils now that they are done, but the truth is, I was too excited to put
them on the candle jars and paint the candle jars that I completely forgot to
take a picture. If you have any questions, though, comment, and I will try to
answer your question as best I can! J

No comments:
Post a Comment