Tuesday, July 31, 2012

Chickpea and Tomato Salad

So, I am always hungry in the afternoon and right now I can’t get too terribly many options of food delivered until after sundown. I know, you all feel so sorry for me with my food delivery, right?
Well, I decided that I wanted a quick and easy snack to have around the house so that when hunger strikes, I am not just eating some crackers or cereal.
I had actually had a similar salad to this one last week at my monthly book club meeting and had found it incredibly delicious. I then found this recipe on Pinterest and decided it was worth a shot.
Here is the link to the original recipe (although I followed the recipe pretty closely): http://greenlitebites.com/2011/06/20/chickpea-and-tomato-salad-with-fresh-basil/

Chickpea and Tomato Salad

Ingredients:
*1 can chickpeas, drained and rinsed
*About 1 pint grape tomatoes, halved
*25 large basil leaves, chopped (I used my hands and just tore apart the basil leaves.)
*3 cloves of garlic, minced
*1 tbsp red wine vinegar
*1 tbsp apple cider vinegar
*2 tsp olive oil
*1/2 tbsp honey
*pinch of salt (yes, that is my salt in the Corona bottle!
J)

Directions:
Place all ingredients in a bowl with a lid. Shake the bowl so that all of the ingredients are mixed together. Place bowl in the fridge and let it chill for at least 20 minutes. Then enjoy!

What did I think about this recipe?

I would add more tomatoes and would quarter the tomatoes so that they are more evenly distributed. I love tomatoes though, so this may be a completely personal choice.

I would add cheese to this. In fact, I did add cheese to the top of my salad when I had it for lunch, but I think that feta cheese would be a great addition to this salad.

This salad is also very good to eat on top of some Triscuit crackers. I liked to eat the tomatoes especially with the crackers!

Ultimately, this is a great recipe and I will definitely be making this quite frequently since it was inexpensive, easy, and tasty!

Monday, July 30, 2012

Monogrammed Candle Jars


So a while back I had posted a blog about how to remove wax from a candle jar. I originally said in the blog that I would find some project to do with these jars and then would post a blog with instructions to that project.

Well, I just happened to think of a project the other day that I thought would be cute.

We have a table in the entry way of our apartment. It has been decorated in many different ways over the past couple of years including with a paper swan and a vase full of wine corks. Well I decided that I wanted something a little more personal and decided to make these monogrammed candle jars with our last name.

I didn’t have an original blog to base this off of so excuse me if some of the directions are not as clear as they could be. J

Monogrammed Candle Jars:

Materials Needed:

*Candle Jars (wax removed and jars washed)
*Stencils (I did not have actual stencils so I made my own by printing off letters from the computer and then tracing them on contact paper)
*Enamel paint (Yes, you will need Enamel paint so it can stick to the glass)
*Paint brush (I prefer to use the spouncer sponge brush for painting on glass as it gives it a little texture.)
*Some type of filler for the candle jars ( I am using small foam balls, but you could use whatever you want for this.)

Instructions:

1. First of all, make sure your candle jars are completing clean and that all of the wax is removed from the jars. If you need some tips on getting the wax out, here is my tutorial for removing wax from candle jars: http://danielleoxley.blogspot.com/2012/06/removing-wax-from-jars.html

NOTE: A great product to help you remove labels and also the wax inside the candle jars is Goo Gone. I use it every time that I am cleaning out a candle jar now.

2. Now you will need to place the stencil on the candle jar. By using the contact paper, I knew that I would be able to get the stencil to stay put on the glass candle jar, but you can also try adhesive stencils (sold at basically every craft store) or some tape to hold the stencil.

NOTE: I chose to use contact paper because I knew that I would not have to worry about the stencil moving once I placed it on the glass jar. If you need directions on how to make contact paper stencils, I have posted a little blog tutorial here: http://danielleoxley.blogspot.com/2012/07/contact-paper-stencils.html

3. Pour some of your paint onto a paper plate or other object that you don’t mind getting paint on. This will help you get the right amount of paint on your brush for the stenciling.

4. Place the paintbrush that you are using in the paint and get as much paint as you would like. Like I said above, I like the spouncer sponge brush because it gives you a little texture. I also like it because it does not leave streaks like a normal paintbrush does. And it is super easy to just daub the paint all over.

5. Remove the stencil and let the paint dry on the candle jar. If you need to do any touch ups, I recommend you do this before you remove the stencil so that you do not get random paint all over the place.

NOTE: You can bake the candle jars to cure the paint or you can leave the jars out for 21 days so that they cure. I wasn’t worried about letting them cure before doing the next step because I did not plan on washing these jars anytime soon.

6. Once the paint has dried, fill the jars with whatever filler you are using. You can now place the jars wherever you would like in your house.


NOTE: I plan on painting the lids of these jars as well with brown paint, but didn’t have any on hand while I was working on this project so that will have to just wait for another day.

Contact Paper Stencils

Contact Paper Stencils
Materials needed:
*Contact paper (I buy this in a roll for less than $3.00)
*Scissors
*Pencil
*Print-out of letter or object that you are going to make a stencil of

 
(Sorry that I didn’t get a picture of the letters before I cut them out. I hadn’t actually planned on making this blog, but when I started typing up the blog post for the candle jars, I thought this might be helpful.)

**Please note that these stencils will most likely only be able to be used once since they will get pretty messy when using them with paint.**
Instructions:
1. Print out whatever letters or objects you want to make a stencil of. In order to do this, I just found a font that I liked in Microsoft Word and typed up what I wanted to have made into a stencil.
2. Cut out the letters or objects that you printed out. Get as close to the edge as you can when you are cutting and try to cut as straight as you can so that your stencils do not wind up all crazy looking.
3. Trace the letters or objects that you want to use on the backing side of the contact paper. You will need to turn these the opposite way in order to have the letters and objects be the way that you printed them out.
4. Cut the letters or objects out of the contact paper. Leave the backing of the contact paper on until you are ready to place this on whatever project you are working on.
This is a great cheap way to make stencils especially if you are using them for painting because you do not have to worry about washing them when you are done. I just use these for one project and then throw them away when I am done.
Ok, I know I should have a picture of the stencils now that they are done, but the truth is, I was too excited to put them on the candle jars and paint the candle jars that I completely forgot to take a picture. If you have any questions, though, comment, and I will try to answer your question as best I can! J

Sunday, July 29, 2012

Fleece Tie Baby Blankets


Ok, so I think just about everyone out there has their go to baby shower gifts.

Well, for the last few years, I have made everyone the same baby shower gift and they really seem to be a big hit. What is it I make you ask? Fleece tie blankets.

I know some people don’t like to use these because of a choking hazard, but I love these and they are great for during tummy time and depending on the print of the fabric that you use, they can be great for pictures too. In fact, one of my friends had twins last year and I always see cute pictures of her babies on the blankets when I log into Facebook.

I am sure there are a million tutorials out there for this project, but since I have been making these for years, I won’t be searching for any tutorials to link here. Feel free to leave a comment if you know of a really great link to a project like this so that other people can use it though!

Fleece Tie Baby Blankets

Materials needed:

*1 yard of fleece material in any print, cut in half
*1 yard of fleece material in solid color, cut in half
*Rotary Cutter
*Quilting Ruler
*Quilting Cutting Mat
*Scissors


Note: You do not have to use a rotary cutter, quilting ruler, and cutting mat if you do not have one. I have a bit of OCD and a perfectionist personality so I like all of my strips to even. If you are not like me in this sense, you are more than welcome to use your scissors and just eyeball your cuts in the fabric.

Instructions:

1. Make sure that your two materials are the same size. You do not want one fabric being longer on one side and shorter on the other because it will make your blanket look really funny! (Believe me, I have been there before without realizing it.)

2. Once you have lined up your fabric and made sure that both pieces are the same size, you will need to cut the corners out of the fabric. I cut a 3 inch by 3 inch square out of each corner, but you can do more or less depending on how long you want your fabric strips and ties to be.
(I use my quilting ruler for this, but if you do not have that, find a square of paper or other fabric that is the size you are wanting to cut out of each corner and use it to cut each corner to make sure they are all the same size.)

3. Now comes the fun part: cutting all the strips. I space my strips out to be about an inch wide. The length of the strip will be the same size as the square that you cut out. See the picture below for reference if you are unsure about this step. In order to cut my strips, I use my rotary cutter and the quilting ruler, but if you are using scissors, now is where you can eyeball the strips. I have made blankets before without the rotary cutter and mat and they have turned out just as cute!

4. Once you have cut all the strips, it is time to tie the strips. This is a very easy step and can be done basically however you want as long as the two strips from your two pieces of material match up and are tied together. I always run around the edge of the blanket and tie all of the strips. I then go back around and make sure all of the strips are tightened. Here is a picture of a blanket that is completely done.

Now you can go and make these with any fabric choices you want and can give these as shower gifts.

If you want to make bigger blankets for older youth or adults, you will just need to decide how much fabric you will use. I have made adult blankets before with 2 yards of fabric and they have been good sized!

Wednesday, July 25, 2012

Button Tree Canvas


So as soon as we found out I was pregnant, I started looking up craft projects to do. My excuse was that the more that I did, the more love the child would feel. Of course, I know the child would feel loved even without a bunch of handmade stuff from mom around, but it sounded like a good reason to find more craft projects at the time.
I found a million pictures of button trees on Pinterest and decided that is what I wanted to base the baby’s nursery around. Well, plans have since changed and I have decided to do a more jungle/safari theme with a few trees thrown in for good measure.

Just like my plans changed for the whole theme of the room, my plans have also changed for how I will mark the nursery. I was going to make a ribbon wreath, but since we are in a foreign county and will be moving before our child has a full nursery, I decided that I would do something with a little more structure for the time that we are here. Thus, I decided that this was the perfect time to create one of these button trees. It will hang on our spare bedroom, which will also be where we are storing all of our child’s clothes, diapers, etc. when they are not in use.
So the next step was to find a tutorial on how to do this button tree. Yes, I could figure it out all by myself, but I wanted to make sure that I was using the correct supplies and all that jazz. Well, Pinterest was actually no help here because all of the links that were on there were just pictures of people’s final projects. Alas, I remembered this little website called Google, which tends to have just about everything on it!
Here is the link to the tutorial that I found that I will be basing my project off of: http://artbywiley.blogspot.com/2012/03/button-tree-tutorial.html

**Warning I will be doing quite a few things differently for this project than the tutorial that I just posted the link for, but that is because I am working with a specific kind of button that I bought and a bigger canvas. There are lots of ways to do different variations of this project though.**
Button Tree Canvas
Materials Needed:
*A Canvas (I got mine at a local discount store, but most craft stores sell these as well. I also found this website: http://www.dickblick.com/products/blick-academic-58-profile-canvas/ that has some pretty good prices on craft supplies, and their canvases are pretty cheap.)
*Acrylic paint (I used Folk Art Acrylic paint for this project because I trust that brand, but any acrylic paint will work. You will also need to get as many colors as you plan to use. I used two colors, one for the background and one for the tree.)
*Paintbrushes for painting the background of the canvas (if you wish to) and the tree.
*Any paint supplies that you usually use when painting (a cup of water, rag, paint palette, etc.)
*Buttons (I bought a bunch of value packs of buttons in similar colors because I knew I wanted blues and greens for my project, but any buttons will work)
*Craft Glue to attach the buttons (I used Tacky Glue because it is something that I have at the house all the time, but I am sure that any kind of craft glue or even super glue would work for this project.)


Instructions:
1. Coat the canvas with the background paint. Make sure that you paint all over the front of the canvas and get the sides of the canvas as well so that it all blends together and looks nice and uniform. Make sure to wait until the paint is completely dry before moving it or working on the tree portion of this project. **NOTE: When I paint, I like to hold the canvas until I get to the last side. I paint over newspaper as to make sure that I don’t get paint all over the place and then when I do want to work on the last side, I place the canvas on a jar so that the canvas is not drying on the newspaper(that can leave you with remnants of the newspaper hanging on to your canvas and those can be a pain to get off).**

2. Once you are sure that the canvas is dry, it is time to start working on the tree. I looked all over to find a stencil of a big tree so that this part of the project would be easy for me since I am not good at freehand painting, but could not find anything online so I did the next best thing I know how to do, I asked a friend who is good at painting if she would paint the tree for me.
Here is what the tree looked like when I got the project back from her.


3. Now comes the fun part: planning out where you are going to put the buttons on the canvas. I just set the canvas on the table with a big pile of buttons all around it until I figured out exactly where I wanted all the buttons. Once, I figured out where I wanted all of the buttons to be placed, I took a picture with our camera so that I could remember where I had wanted the buttons to be placed in case I needed to move the canvas at all (This step was unnecessary in my case, but I always like to be over prepared and not need to be.)


4. Once you have figured out where you want to place all the buttons, it is time to start gluing them into place. I left each button where I had placed it and removed one at a time. Once I had removed the button, I placed a small amount of Tacky Glue on the back and then placed the button back on the canvas where I had just taken it from.  A little glue went a long way in my case, but you may need to use more than a little dot of glue for your project.
5. You are now done with the front of the canvas and it is time to hang the canvas. If you want, you can follow the directions on the other blog to put the hooks and wire on the back of the canvas, but I decided that was too much work(and unnecessary since I was hanging this on the door) and therefore just bought a plastic door hook (like the one to hang a wreath with) and used that.

Yes, I added a lot to this tree after my original picture. I just felt that it needed more than what I had originally placed on the canvas. Let me know what you think and I would love to see pictures of your project if you decide to make one of these as well!

Chicken Tortilla Soup (with leftovers)


So I originally found this recipe on Pinterest and was intrigued because it said it was a crock-pot meal. Well, after looking at the recipe, I realized it is not a crock-pot meal, but was so addicted to the idea of making it that that did not stop me!

I had already planned to make chicken tacos in the crock pot and knew that I would have tons of leftovers so I decided this soup was a great way to use those up! I think you could use any kind of chicken leftover with this recipe, but the chicken taco recipe added a bit of flavor.

Here is the link to the original recipe that I followed (kind of): http://homeiswheretheholmansare.blogspot.com/2010/11/chicken-enchilada-soup.html

Be sure to check out both recipes and maybe even make up your own recipe based on our two recipes!

(I apologize again for not taking pictures. Ever since losing my iPhone, it is has been much harder for me to remember to take pictures before I start a project and I usually don’t want to go track down the digital camera in the house. The original blog has some good pictures though.)

Chicken Tortilla Soup

Ingredients:

2 cans of chicken broth
Leftover chicken from chicken taco recipe
2 tsp ground cumin
2 tsp chili powder
½ can of green chiles
1 28 can diced tomatoes
Onion powder
Garlic powder
1 15 oz can black beans, drained
2 cans of corn
1 can tomato paste
Tortilla chips
Cheese for topping soup

Directions:

1. In a stock pot, add chicken broth and heat over medium heat. Add cumin and chili powder. Heat just until warm.
2. Add tomatoes, green chiles, onion powder, and garlic powder to the pot. Simmer for about 30 minutes until tomatoes have begun to break down.
3. Add black beans, corn, and tomato paste. Stir all ingredients to incorporate.
4. Add leftover chicken to the soup. Cook for about 30 more minutes.
5. Remove from heat and let cool for at least 15 minutes. This soup comes off the stove really hot!
6. Crunch up some tortilla chips and place in the bottom of a bowl. Ladle some soup over the top to cover the tortilla chips. Add some more crunched up tortilla chips on top of the soup and top with cheese.
7. Enjoy!

My thoughts on this recipe:

This is a great way to use up leftover chicken. If you are not starting from leftover chicken, I would follow the instructions on the original blog in order to cook the chicken.

This recipe will make quite a bit of soup so plan on eating leftovers for a while or plan on sharing with some friends. I actually plan to make this right after having the baby so that I can have lunch for a few days!

You may notice that the original recipe added cheese into the soup before taking it off the heat. I do not like the mess that this creates in the pan so that is why I add my cheese at the end. If you are ok with the melted cheese sticking to the pan, feel free to add it in when you add the black beans, corn, and tomato paste.

There are plenty of recipe variations from my recipe to the original recipe. Part of the reason for that is that it is hard to get some ingredients here and the other part of the reason is that I just didn’t have the ingredients on hand and substituted with what I did have. This soup is great for that because you can add what you like in it and it will still turn out great!

This recipe will definitely be added to my frequently cooked recipes.

Monday, July 23, 2012

Crock-Pot Chicken Tacos


So lately I have decided that we need to save more money. And one great way of making sure to save more money is cook more meals at home.

I actually love to cook, but since I have been pregnant, standing up and cooking a whole meal can be a little bit of a challenge. So I decided to use the crock pot a lot more often.

I love my crock pot anyways and am always up for a good recipe for it. Mainly because our oven here only heats from the top so cooking tends to be a little challenging. I found this recipe and decided that it was going to get made because not only did it look good, but I could instantly think of two other meals to make with the leftovers (yep, those will be posted in the next couple of days).

So here is the link to the original recipe that I followed: http://www.raininghotcoupons.com/crock-pot-chicken-tacos-recipe-super-easy-and-yummy/

As always, there will be little variations in my recipe and the original so make sure to check out both!

Crock-Pot Chicken Tacos

Ingredients:

*Tortillas (I used flour tortillas because they were what I could find at the store here.)
*1 package of 1.5 oz Taco Seasoning
*1 package of 1 oz Ranch seasoning (My husband is not a huge fan of ranch so I didn’t want to overload the chicken with ranch taste.)
*6 frozen chicken breasts (I used a whole bag of frozen chicken breasts)
*1 can of chicken broth
*Chicken Gravy (I couldn’t find a can of this at the store so I bought a packet of gravy mix and mixed it with water before throwing it in the crock-pot.)
*Sour cream (optional-for tacos)


Directions:

1. Place frozen chicken in the crock pot.
2. Add the taco seasoning, ranch seasoning, chicken broth, and gravy mix on top of chicken in the crockpot.
3. Cook on high for 3-4 hours.
4. Shred chicken with forks and place the shredded chicken back in the crock-pot. Leave chicken in the crock-pot for about 45 minutes so the meat soaks up some of the yummy juice.
J
5. Make tacos with tortillas and the shredded chicken. Top your tacos with whatever you like on your tacos.

My thoughts on this recipe:

This is a great recipe! My husband couldn’t stop raving about how good the tacos were and he is usually not a fan of things with tortillas.

The chicken can be a little tough to shred. I wore out my hand doing this(granted, I am kind of a wimp anyways), but after some help from the husband, we got the chicken shredded.

I turned the crock-pot down to low when I put the chicken back in to soak up some of the yummy juice. I figured the chicken had cooked enough and I didn’t want it to dry out the chicken too much!

It is a good idea to check the chicken a couple hours into cooking. When I checked mine, half of the chicken was left almost completely out of the juice so I threw it down in the juice at that time. I could tell the difference between the chicken that had been in the juice the whole time and the chicken that I threw in the juice halfway through when it came time to shred the chicken.

I topped my tacos with cheese, sour cream, and salsa! I would have liked to add some tomatoes to it, but didn’t have any on hand.

This is a recipe that will be added to my frequently cooked recipe list! The husband was already asking for me to make it again before he finished eating his tacos!

Make sure to check back tomorrow when I show you what I did with the leftover chicken I had!

Crock Pot Breakfast Casserole


Ok, so let me preface this blog post by saying that you will probably be seeing a lot of crock pot recipes from me in the near future. There are a couple of reasons for this. 1. I am currently pregnant and it is a lot easier for me to throw everything in the crock pot in the morning and let it cook. 2. I love my crock pot. It really does make my life easier!

So, I found this recipe a couple months back on Pinterest and knew it was something that I wanted to try. I couldn’t bring myself to get up early in the morning to put this in the crock-pot to have it ready for an actual breakfast or even a brunch, though. It is a good thing that my husband and I are both big fans of brinner (breakfast for dinner).

Here is the link for the original recipe: http://www.alattewithotta.com/2010/11/crock-pott-recipe-egg-brunch-casserole.html. As always, check both my blog and the original blog as I made some changes to the recipe as I made it.

After a couple of days of saying I was going to make this, I finally made this last night. It was very good and definitely a recipe that I will keep around. This meal would be great to put on after a late night or when you know you will need a good breakfast in the morning (before visitors travel home, etc.)

I am taking this time to apologize that there are not any pictures. I promise I will get better at that. There are pictures on the original link, though. J

Crock Pot Brunch Casserole

Ingredients:

*6-8 strips of bacon
*1 onion peeled and chopped (My onions had actually gone bad by the time I made this recipe so I used onion powder instead. It worked out well and it was good because my husband doesn’t like slimy onions anyways.)
*1 clove garlic, peeled and minced ( I used the jar minced garlic for this recipe for the sheer fact that I had it already and didn’t feel like dealing with fresh garlic.)
*1 red bell pepper, seeded and chopped
*1 green bell pepper, seeded and chopped
*1 (2 lb.) bag of frozen hash browns
*12 eggs
*1 ½ cups shredded cheese (I used the Mexican blend of cheese for this recipe, but think it would also be great with cheddar.)
*1 cup whole milk

Directions:

1. Spray crock pot with non-stick cooking spray.
2. Cook bacon until crisp. Let bacon cook and then chop into ½ inch pieces. Set aside. (I actually cooked the bacon the night before so that I wouldn’t be worrying about it in the morning.)
3. Saute onion, garlic, and bell pepper for 5 minutes.
4. Place 1/3 of the frozen hash browns into the bottom of the crock pot. Add 1/3 bacon, 1/3 onion and bell pepper mixture, and 1/3 cheese.
5. Repeat step 4 until you have used up all your ingredients. (3 times for those of you counting.)
6. In a large bowl mix eggs, milk, and any seasonings you have decided to add in.
7. Pour egg mixture over ingredients in the crock pot, cover and turn on low.
8. Cook entire casserole on low for 8-10 hours.

What did I think about this recipe?

I really liked this recipe. I was worried about it at first because I am not a huge fan of breakfast casseroles or omelets, but this turned out to be a great meal!

I paired this up with some buttered toast and thought it was a well-rounded meal.

My husband wound up putting more cheese on the top of his serving because the potato to cheese ratio for him was not to his liking. I could see how this meal could use a little more cheese, but I like potatoes so I was ok with how the meal tasted.

I would add more meat into this meal the next time I make it. While there was a lot of bacon in here, it didn’t seem to be even for every bite or two that you got. I would also like to add that in talking to my husband about what could have been done better, we decided it might be better to cook the bacon while the rest of the mixture is in the crockpot and just throw the bacon on once the egg, potato, bell pepper, and cheese mixture is done. The bacon tends to lose its flavor when it has been in the crock pot all day.

All in all, I would recommend this recipe to just about anyone as it was easy and made a great meal. The only thing that I advise is that if you want to make this for breakfast know that you will have to start the crock pot in the middle of the night!

Tuesday, July 17, 2012

Crock Pot Macaroni and Cheese


Ok, so anyone who knows my husband knows that he is a macaroni and cheese addict. When we first moved here to Bahrain, the NEX was out of Velveeta Shells & Cheese for like 2 months and so when we finally moved into our flat, we had my mom mail us a package of like 6 boxes of it! Needless to say, as soon as we got the box open, the water was already boiling because someone just happened to have a craving for some macaroni and cheese.

I do like a good macaroni and cheese every now and then as well. I can pair it with so much and it is such an easy thing to make. Well, I generally like to make mine from the actual block of Velveeta and milk instead of using the little packet of cheese inside the pre-made stuff, but macaroni is macaroni in my eyes. As long as it doesn’t taste all gross and powdery that is.

The recipe on the blog today did not actually come from Pinterest. I know, I know. We are all surprised. Now, I am sure this recipe is on Pinterest now and I actually pinned it to my crock pot board so I know for a fact that it is at least on there now, but I did not go looking for it on Pinterest.

I was actually watching The View. Yes, we actually get that over here on the normal cable and it generally shows the episode that aired in the States the day before. So it has become one of the few ways that I stay up to date on news stories. Well, Trisha Yearwood happened to be on this episode and I have loved her ever since I was a kid. I mean, what is there not to love about a woman who does not try to fit into a size 0 pair of jeans all the time and can belt out an awesome song. (Yep, that’s right there is nothing not to love about her.) She was talking about her cooking show, which was news to me since my Food Network feed doesn’t work here, and her cookbook. She made this macaroni and cheese for the co-hosts on The View and told them it was made in the crock pot. Yep, as soon as she said those words, I was on Google looking for the recipe.

Well I found the recipe here: http://fullbellies.blogspot.com/2010/04/crockpot-macaroni-and-cheese.html and made a few variations of my own.

I made this for dinner last night and I am pretty sure my husband has found a new recipe for me to make for Command cook-outs and stuff. He was even caught a few times sneaking tastes from the crock pot itself.

I apologize now that there are no pictures for this recipe. You can see how yummy this recipe looks after it is done if you go to the source that I linked you to on here. (I promise to get better on this whole taking pictures thing eventally.)

Crockpot Macaroni and Cheese

Ingredients:

*8 ounces elbow macaroni, uncooked (Yes, I said uncooked and yes, I said only 8 ounces of macaroni. I didn’t think this would be enough when I looked at all the other ingredients, but it wound up being perfect.)
*1 12 ounce can evaporated milk
*1 ½ cups whole milk (I am sure you could use other milk if you want, but it will not make the cheese mixture as thick)
*2 large eggs, beaten (A great way to sneak in eggs if you can’t get your kids to eat eggs normally.)
*1/4 cup butter, melted
*1 8 ounce brick sharp cheddar cheese, grated
*1 12 ounce brick medium cheddar cheese, grated (Yes, I am aware that 12 ounce bricks of cheese are not common, but I used a 16 ounce brick and chopped off a quarter of the brick before I started grating the cheese.)
*Cooking spray

Directions:

In a crockpot that you have sprayed with cooking spray, mix the macaroni, both types of milk, eggs, butter, and almost all of the grated cheese. (The original recipe calls for you to leave out ½ a cup of the grated cheese, but I just eyeballed this.)

Sprinkle the reserved cheese over the top of the mixture. Cook on low for 3 hours and 15 minutes.

**NOTE: You will notice that the original recipe calls for salt, pepper, and paprika and my recipe does not call for any of that. I do not generally cook with salt and pepper and I am not actually a huge fan of paprika so I decided to omit all that from the recipe. You may think that this would make it bland, but it did not affect the taste of the macaroni at all.**

Turn off the crock-pot after the 3 hours and 15 minutes, cut into the mixture and serve hot. 

**NOTE: The original recipe says to stir the mixture, but my husband and I found that it was very easy to just slice through the top layer of cheese and fill up the serving spoon with the macaroni mixture that was at the bottom.**

My thoughts on this recipe:

This recipe was amazing and was so good. Yes, it is still quicker and probably a little easier to make macaroni and cheese on the stove-top (especially if you are making the boxed kind.) This recipe just tasted so much better! I will definitely be making this recipe more often because of the fact that it tasted so much better than the stove-top macaroni that I normally make.

This recipe would be great to take to a potluck event. The eggs and all the milks that are inside of the macaroni mixture actually make this into a bulkier meal than it would normally be and that would help this meal to spread to more people!

Sunday, July 15, 2012

Jersey Rug: Part 1


So I was searching around on Pinterest one day right after finding out that I was pregnant and found this project: http://xoelle.com/2009/05/t-shirt-latch-hook-rug-tutorial/

Me, being the crafty person I am, thought I can totally do that and I doubt it will take as long as the other person said it took. And, I just happened to have a set of jersey sheets that somehow shrunk at our last duty station so they were just begging to be cut up and walked on. J

Well, I’m going to warn you that I was wrong about it taking less time than the other person. This is a very tedious project and contains many tedious steps so it will take you a good amount of time, but it turns out being a very cute rug when you are done with it and it is well worth the time and energy put into it when you see how cute and plushy it is.

We plan on using our rug in the baby’s room when he finally graces us with his presence.

Here is how I went through this project (NOTE: many of my steps will be the same as the other link so feel free to use either of our pages for the steps. I forgot to take pictures when I first started the project so many things may be pictures that I found online.)

I apologize in advance for the lengthiness of this blog and the fact that the project is not completed!

Jersey Knit Rug

First, you will need to gather all of your materials for the rug. If you are like me, this could take a while, but that is because finding jersey knit in the country I currently live in is a little tough. Luckily for me, I had a trip planned to the States and an awesome mother who helped me cut a ton of the fabric. (Yes, I could have bought sheet sets in the colors that I wanted, but I knew that if I could catch the jersey knit on sale, it would be cheaper and easier for me to get some of it. I will say it was easier to cut the jersey knit fabric from the craft store since I did not have to worry about cutting off the outside seems first, but believe me old jersey sheets or even t-shirts would work great for this project.)

The materials you will need are:

*Jersey Knit fabric cut into 4 inch long by 1 inch wide strips (You can purchase jersey knit by the yard at most craft stores or you can use a set of jersey sheets. I found that the jersey knit material from the craft store is a little thicker than the jersey knit sheets, but I used both in my project. The amount of fabric you need is dependent on how big you plan on making your rug. I will be using no more than 3 yards of any of the colors I have.)
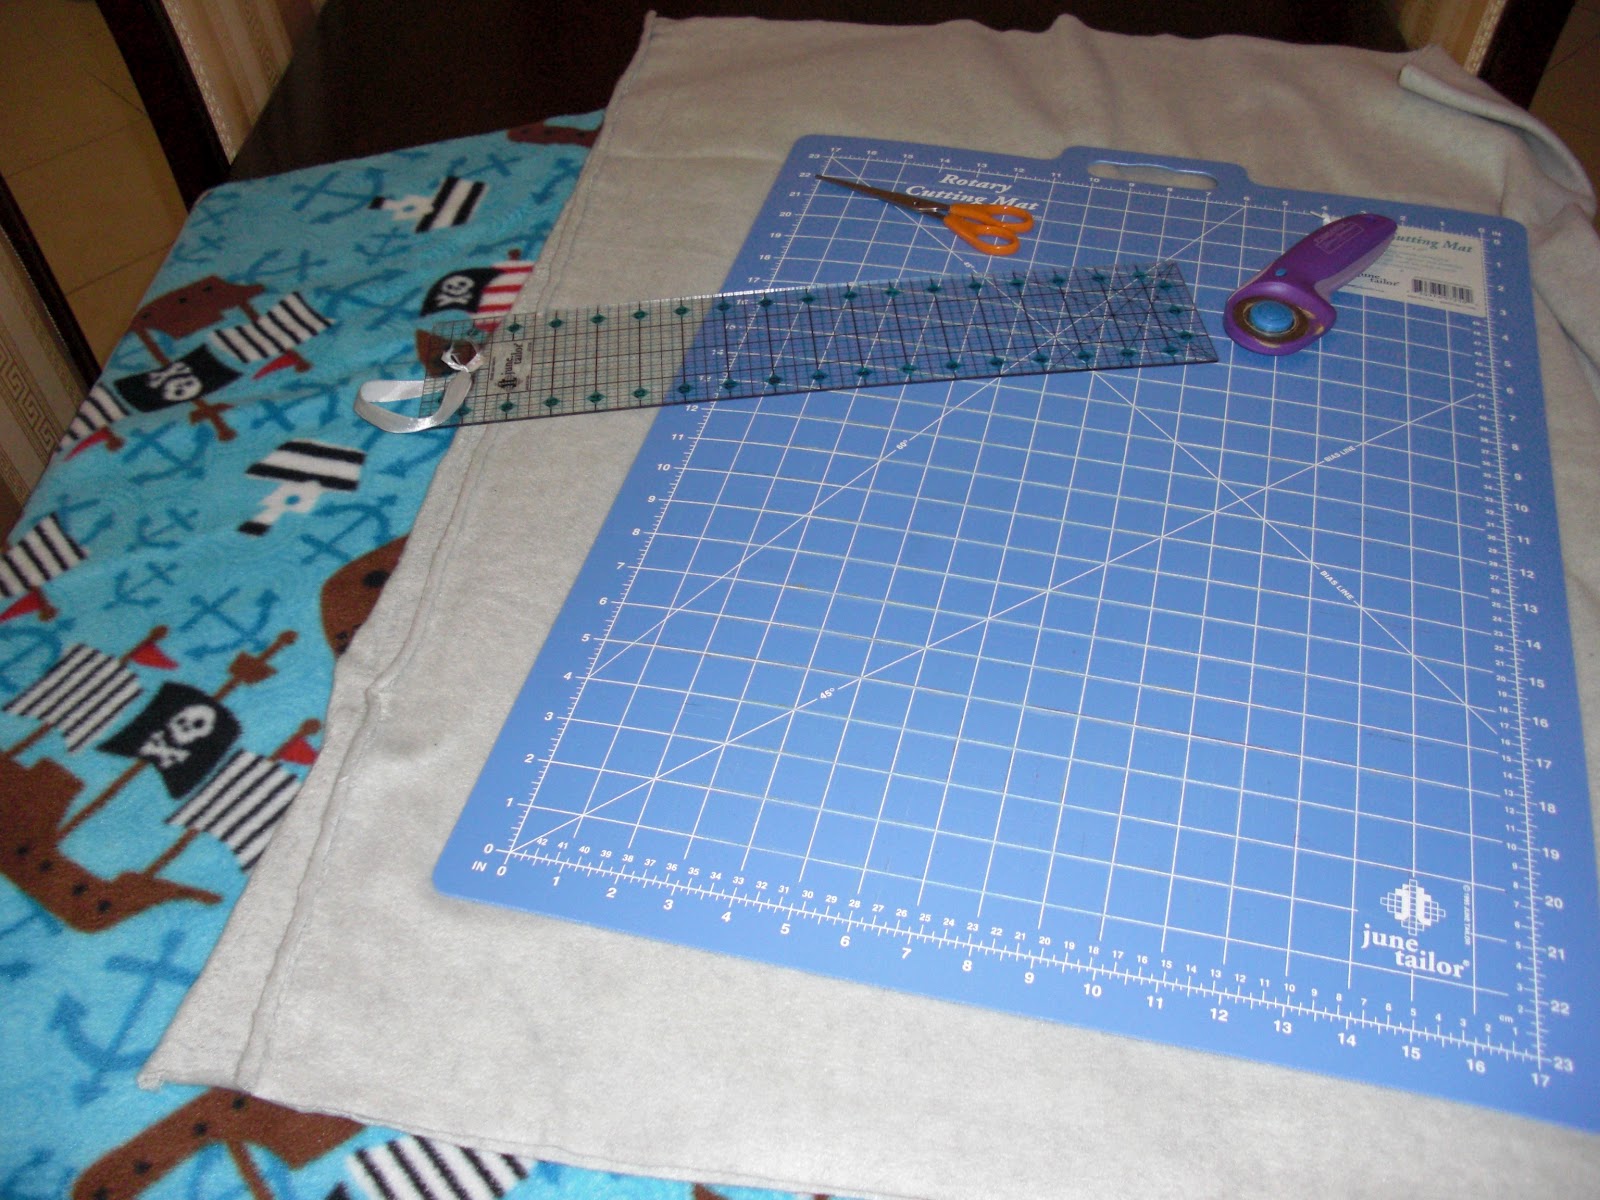
*A rotary cutter and mat to cut your strips (Or scissors or dress-making sheers if that is what you have)
*Latch hook canvas (I used the 36” by 60” 3.75 mesh. It can be found at any craft store or online from any craft store)
*A latch hook tool (These can also be found at any craft store and come in a different styles. Find one that feels comfortable in your hand as you will be using it a lot to get all those strips put into the rug.)
*Rug Binding (I found there are a few options for this online and at craft stores and I opted to use an iron on rug binding. I will review this part of the project on another blog, once we get through the rug making process and once I actually get to that step.)

Now, let’s start putting your rug together:

1. First things first, make sure your material is cut into 4 inch long by 1 inch wide strips. You can either do this all in bulk or you can do this a little at a time and work on the rug as you get the strips done. I cut my strips all at once and bagged them into bags of 100 to keep them organized.

2. Now, you need to plan. There are many options to this rug (different colors, patterns, etc.) so you will need to plan how big you want this rug to be and also how you want to put the strips into the rug. I decided that I wanted to make this rug 11 squares by 12 squares on the latch hook canvas. Once I started hooking the material in, I decided that my pattern would be 1 square left blank between the white and aqua color strips, 1 square left blank between the aqua and blue color strips, and 2 squares left blank between the blue and white color strips that I was using. (The reason for me leaving 2 squares between the blue and white color strips that I was using was for the sheer fact that the material is thicker and thus harder to tie in a knot when it is too close to the other fabric). I also decided to leave one strip open between each row of latch hooking that I did.
**NOTE: This step may take a little hands-on planning on your part. I originally thought I would do every other square on the canvas with material, but once I started working with the material, I learned that was going to be a little too difficult.**
Here is a picture of the back of the rug so you can see a little of what I am talking about regarding the pattern:


3. Leave a good amount of space around where you are latch hooking so that you do not have to use masking tape to tape off the edges. Of course you can use the masking tape like the other blogger did, but I didn’t have any lying around and I was too lazy to go to the store to get some.

Now, you will start the actual latch hooking. If you are lucky, you will be able to follow the normal directions for latch hooking, but my fabric was too thick so I was only able to do some of it with the tool and then had to do the rest by hand.
**Here are the normal directions for latch hooking (and they can also be found on the other blog that I had posted at the beginning of the post.) First, you will need to pull the latch hook tool through a strand of the canvas. Next, you will need to place the material (as close to the middle of the material as you can get) into the latch hook tool. From here, pull the latch hook tool down through the canvas, making sure that you take the bottom of the strip of material with it, but also making sure to leave about half of the strip of material sticking out from the canvas (The other blog has great pictures showing you exactly how to do all this. Sorry, I am really not that great at remembering to take pictures.) Slide the tool up the remaining ends of the strip of material and catch them, and then pull them through the loop made by the strip of material below the canvas. **

If your material is too thick like mine, you will find that it is too difficult to do the last two or three steps, which begin with sliding the tool up the remaining ends of the strip. I did this step by hand and wound up just grabbing the loop that is made by the strip of material and pulling the other ends of the material through the loop. It may be a little more work with your hands, but I don’t think it takes much extra time.

**NOTE: This step may take a little practice so if you do not get it right on your first try, don’t give up. It will come to you with time. J**

4. Continue step 3 until your rug is the size that you want it to be. This will be all you need to do to make the actual rug. Once this step is complete, you will need to do the binding on the rug.

Here is a picture of my rug with all the work that I have finished on it now. Once I get the rug finished and start binding the rug, I will post another blog post to show you those steps as well.

Wednesday, July 4, 2012

Italian Grilled Cheese Sandwich


We love grilled cheese in this house! Ever since I found out I was pregnant, my grilled cheese addiction has only gotten worse. Part of this reason is that the only things I could seem to keep down during the first trimester were hamburgers, French fries, macaroni and cheese, and grilled cheese.

So the other day when I was looking around Pinterest (yes, that is a daily occurrence by the way), I found this recipe for grilled cheese and it just looked so scrumptious. It also looked like a good way to sneak in some eggs!

So today, while my husband is at a water park and everyone in the States is celebrating the 5th of July with barbeques and get togethers, I decided to try this recipe out. 

I couldn’t even wait until lunch time to make this recipe because I woke up starving so I wound up making this recipe around 10 am!

Here is the link to the original recipe that I am “following:” http://trickschefs.com/showthread.php?tid=154 Note the quotation marks because I had a few substitutions due to what we had around the house.

Italian Grilled Cheese Sandwich

Ingredients:

*3 eggs
*2 tablespoons milk
*2 teaspoons garlic powder
*2 teaspoons Italian seasoning (I used Mrs. Dash’s Italian seasoning for this)
*2 tablespoons grated Parmesan cheese
*2 slices Cheddar cheese (yes, the recipe calls for American cheese and I would have used it, but our local supermarket did not have any American cheese and therefore I decided to use the cheddar slices that they did have)
*4 slices sandwich bread (I used wheat bread for this because I don’t normally buy white bread, but I feel like this is a recipe where white bread might be a little better!)

NOTE: The egg mixture could have been made smaller since I used a lot less cheese and bread than the original blog post, but to be honest, I just didn’t feel like dealing with measurements or anything like that and decided that even if I had extra egg mixture, it would not be that big of a deal. Feel free to make a smaller amount of the egg mixture though if you can’t stand to waste!

Directions:

1. Whisk eggs, milk, garlic powder, Italian seasoning, and Parmesan cheese together in a bowl.
2. Place each cheddar cheese slice between two pieces of bread to assemble 2 sandwiches. (Note: Your number of cheese slices and number of sandwiches will vary depending on how many sandwiches you are making at the time. Next time I make this, I am sure my husband will be around so I will have to make at least 4 sandwiches.)
3. Heat a non-stick frying pan or griddle over medium heat (Note: I have stainless steel pans so I sprayed a little bit of Canola oil in the pain while it was heating up. I hate cleaning up egg messes from the pans later! I also put that you could use a griddle here because if you are making more than a couple of sandwiches, it would save you a little time to make them all at once on the griddle.)
4. Dip both sides of a sandwich in egg mixture. (The original blog says to dip each sandwich in, but I didn’t want to make a mess with the second sandwich while cooking the first so I did this one sandwich at a time.)
5. Place dipped sandwiches in the hot frying pan; cook until golden brown and cheese is melted. (The original blog post says about 3 minutes per side, but this will vary depending on your stove and pan and all that!)

Here’s a picture of my completed sandwiches:


So what did I think about this recipe?

I thought that the extra ingredients added a bit of a different flavor, but to me, this is not something that I would make all the time. I would like to try this recipe again with smaller white bread (we generally only get big loaves of wheat bread here) and American cheese. I also would make it on the griddle because this made a huge mess of my pan!

Some tips that I have for you:

*Make sure that you get the sandwich cooked really well. One of my sandwiches was a little soggy and I couldn’t get past the sogginess to actually eat the sandwich.
*You may want to add a little more milk to the egg mixture to help keep the sandwich from sticking to the pan as well.
*This sandwich is not one that you can make and let it sit for a couple of minutes before you eat it. It needs to be eaten right after taking it out of the pan because it does tend to get soggy again if it sits for a little while.
*This recipe can get messy with the egg mixture so plan on dirtying up a few dishes to make these sandwiches.
*Using a pie pan instead of a bowl to mix up your egg mixture helps you make sure that you get an even coating on the bread of your sandwiches.

If you think the original recipe looked good, I say try it for yourself and do not let my experience deter you from it! If you have a really good experience with either this recipe or the original recipe, please leave a comment so I can know about it!